 Welcome to our third installment of Teacher Training Bootcamp: Google Docs & Drive.
 Google Forms is a special feature of Google Sheets (spreadsheets). It has so many uses:
- surveys of students, parents, or faculty
- assessments of students (or teachers)
- a way to enter rubric data
- for peer editing feedback
- assignment submission
- applications for clubs
- just about anything you need to collect data for
Forms are super easy and quick to create! Here's what you need to do to create a basic form:

Go to your Google Drive, click on "Create", then choose "Form".

Give your form a name and choose the theme you want to use (this is just one of the many places where you have the opportunity to name your form).
If you are a Google Apps for Education school, in the "Form Settings" section you will have the option to require the user to login to your domain. (I don't usually check this because students are accessing my forms on iPads and aren't signing into Google. You would also not want to use this option if you were sending the form to someone out of your domain.)

In the next section, you enter your question in the "Question Title" box. Click on the pull down arrow next to "Multiple choice" if you want to change the type of question. Underneath that you can enter the choices the user will be presented with. You can make it mandatory to answer this question by checking off the "Required question" box. When you are done editing that question, click "Done". Click on "Add item" to add another question.
In the last section, you set options for the confirmation page. You can allow the user to submit another response, allow them to see the results of the form, and/or allow them to go back and edit their responses.
.JPG) When your form is complete, you can click on "View live form" to see what your form will look like to the users. If you are happy with the way it looks and are ready to send it to your users, click on "Send form". You will be given several options for sharing your form: you can copy the URL, send it via Google+, Facebook or Twitter, grab the embed code to put it on your website, or email it. Click "Done" to share it.
When your form is complete, you can click on "View live form" to see what your form will look like to the users. If you are happy with the way it looks and are ready to send it to your users, click on "Send form". You will be given several options for sharing your form: you can copy the URL, send it via Google+, Facebook or Twitter, grab the embed code to put it on your website, or email it. Click "Done" to share it.I like to copy the URL and create a QR code for the students to scan to bring them to my form -- makes the process super easy!
By default, your responses will be collected in a spreadsheet with the same name as your form. While in this spreadsheet, if you click on "Form" at the top and "Show summary of responses", you will get a nice visual summary of the data you have collected.
Interesting Uses for Google Forms:
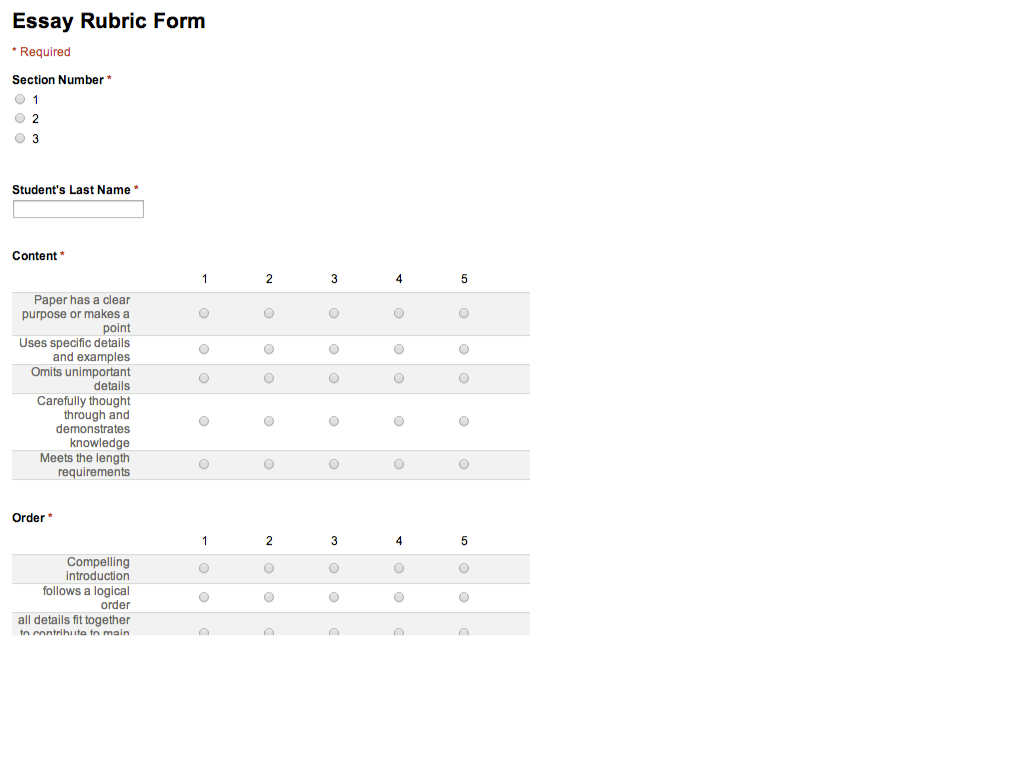
 Kevin Brookhouser uses forms in a really unique way - he set up a form that he could enter the rubric data for a writing assignment. You can search for his template in the public templates. Click on the image of his form to see his video on how to create and use it.
Matt Vaudrey created a report card for himself with Google forms and had his students evaluate him. Check it out here: http://mrvaudrey.com/students/teacher-report-card/
I have used a Google Form to have the students provide me with feedback on their understanding of the current topic we're working on, and about half way through the school year I've surveyed them on what their favorite projects were so far so I can try to do similar types of projects again in the second half of the year. I'm thinking of using Google Forms to collect data from parents at Back-to-School Night next year instead of writing their information on the sign-in sheet.
Check out Graham Attwell's presentation for more great Forms ideas:
No comments:
Post a Comment